189-2464-6170
 szjhpcb@VIP.126.com



Why Is a 1.6mm PCB Coming Out at Only 1.4mm? PCB Thickness, Tolerance and Lamination Loss Explained
Is your finished PCB thinner than the "target thickness" on your drawing a sign of cost-cutting, or normal behavior? This article explains copper flow, prepreg squeeze-out, copper retention and IPC-6012 tolerance — and how to control thickness variation in design.
Direct Answer: Board thickness is a *target value*, not an exact value. During high-temperature, high-pressure lamination, copper foil, cores and prepreg "compete" for thickness; add irreversible resin flow, overlooked outer-layer copper buildup, and fabricators' bias toward the lower tolerance limit, and a finished board thinner than the nominal value is normal — not cost-cutting. Understanding lamination loss and copper retention is the key to keeping thickness variation within your expectations.
You wrote "Board Thickness: 1.6mm ±10%" on the fabrication drawing, measured the sample with calipers at 1.44mm — right at the lower limit — and started wondering whether the stackup was wrong or cheaper material was used. Before jumping to conclusions: every layer of material swells, shrinks and flows from raw laminate to finished board.
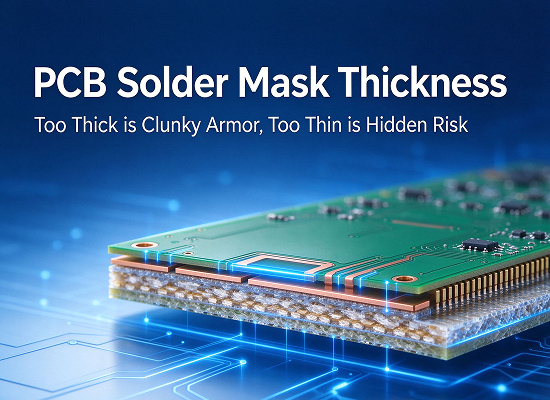
1. A PCB Is Not "One Board" — It's a Stack of Materials
Multilayer board thickness is built up from three material families:
1. Core: Double-sided copper-clad rigid substrate, the "skeleton" of the board. Thickness is relatively stable, with incoming tolerance typically within ±10%.
2. Prepreg (PP): Resin-impregnated glass fiber cloth — the "glue plus insulation layer" between layers. It has an initial thickness before lamination, but shrinks noticeably as resin flows and cures under heat.
3. Copper foil: The conductor layers. Inner layers are thinned by etching; outer layers actually grow thicker after plating and surface finishing.
These materials are stacked in the order "copper foil — prepreg — core — prepreg — copper foil" and fused under heat and pressure. Finished board thickness is simply the total measured from the top copper surface to the bottom copper surface — it is the *result of the lamination process*, not an order written on your drawing.
2. Thickness Calculation: Simple Formula, Hidden Variables in the Prepreg
Finished thickness ≈ outer copper thickness × 2 + Σ(laminated prepreg thickness) + Σ(core thickness)
The formula itself is straightforward. The real challenge is the laminated prepreg thickness:
Laminated PP thickness = theoretical PP thickness − lamination loss
Where does lamination loss come from? Where inner copper foil has been etched away, resin must flow in and fill the gaps. The sparser the inner traces (the lower the copper retention), the more void resin must fill, and the more thickness the prepreg "loses."
Simplified 4-layer example:
- Top copper foil: 1oz (≈35µm)
- Prepreg 2116 ×2: ≈0.21mm theoretical; at 50% copper retention, loss ≈0.018mm → ≈0.192mm actual
- Core: 0.5mm
- Bottom PP: ≈0.192mm actual
- Bottom copper foil: 1oz (≈35µm)
- Total ≈ 0.954mm (target 1.0mm; within ±10% → acceptable)
Here is the counterintuitive part: if inner copper retention rises from 50% to 90%, lamination loss drops sharply, prepreg thickness rebounds, and the total thickness may approach or even exceed 1.0mm. With the same bill of materials, different copper distribution can change finished thickness by more than 0.1mm.
3. Why Do Finished Boards Always Come Out "Thinner"? Three Systemic Reasons
1. Irreversible resin flow: When prepreg resin melts, flows into trace gaps and cures, that thickness disappears permanently — and the lower the copper retention, the greater the loss.
2. Hidden outer copper buildup: The "1oz" in your stackup refers to raw foil thickness. After pattern plating, etching and surface finishing, the outer copper may grow by nearly another 1oz. Theorists often ignore this, but fabricators factor it in during process control.
3. One-directional tolerance squeeze: IPC-6012 gives a general tolerance of ±10%; a 1.6mm board may range from 1.44mm to 1.76mm. To protect yield, fabricators target the lower-middle of the window — coming out thin passes downstream thickness checks and does not interfere with connector mating or housing fit, while coming out thick can cause assembly problems.
4. Special Note: Gold-Finger Boards Define "Thickness" Differently
IPC-6012 has a special rule for gold-finger boards: finished thickness is measured over the gold-finger area, excluding solder mask but including surface-plated copper. For non-edge-connector areas, thickness includes the solder mask. The two measurement bases coexist on the same board and can differ by tens of micrometers. If you design your card-slot gap based on the normal-area thickness, the gold fingers may insert too loose or too tight — a common hidden cause of edge-connector fit issues.
5. Practical Design Tips: Containing the Uncertainty
1. Don't chase exact values in the stackup table: Give the nominal thickness and tolerance; the fabricator adjusts prepreg stock and lamination parameters to actual copper retention.
2. Work backward from copper retention to prepreg selection: Where copper retention is below 50%, add prepreg layers or switch to high-resin-content grades (e.g., 1080), or the dielectric may become too thin and destroy impedance.
3. Mark gold-finger thickness separately on the fabrication drawing: State the tolerance over the gold-finger area and note "excluding solder mask."
4. Lock dielectric thickness on impedance layers: Total board thickness may vary ±10%, but if the dielectric between impedance layers moves more than ±10%, a 50Ω line can become 45Ω or 55Ω and fail TDR.
5. Submit your copper-retention estimate with the order: It is one of the most important inputs for a fabricator's stackup compensation.
6. Juehui Weiye Circuit: Thickness Is the Compromise Between Theory and Process
After more than a decade of building multilayer boards, we have condensed thickness control into four steps:
- Upfront DFM review: On receiving your Gerber, we first run copper-retention and stackup calculations to flag "thin-out risk" areas — instead of explaining deviations after production.
- Transparent prepreg/core selection: We recommend PP type and layer count based on your copper retention, and confirm the stackup with you before release.
- In-process thickness control: Post-lamination sampling and post-outer-layer re-measurement, with thickness test data available on critical batches.
- Gold-finger & impedance specials: Gold-finger thickness measured and marked per IPC-6012 convention; dielectric thickness on impedance layers closely monitored, delivered together with TDR test reports.
About Juehui Weiye Circuit: Shenzhen Juehui Weiye Circuit Co., Ltd. specializes in high-precision multilayer boards, HDI blind/buried via boards, and high-frequency/high-speed boards, plus one-stop PCBA services. We support impedance control, backdrilling, blind/buried vias and other high-speed processes, and hold ISO9001 and ISO13485 certifications. Whether you need stackup optimization for 4-layer to 20+ layer boards, or complex board types with gold fingers and impedance requirements, send us your Gerber files and stackup requirements — our engineering team helps you calculate it right and control it before we talk delivery.
FAQ
Q1: What is the standard PCB thickness tolerance?
Per IPC-6012, the general tolerance is ±10%; for a 1.6mm board, the allowed range is 1.44–1.76mm.
Q2: Is a board coming out thinner a sign of cost-cutting?
No. Finished thickness is the result of lamination and material behavior — resin flow, copper retention and outer-layer plating all cause thickness to "float." A thinner-than-nominal board is usually normal under a yield-driven process window.
Q3: How is thickness measured on gold-finger boards?
Per IPC-6012, thickness is measured over the gold-finger area, excluding solder mask but including surface-plated copper. This differs from the convention used on the rest of the board, so it must be specified separately on the drawing.
Q4: How do I minimize the impact of thickness variation on impedance?
Lock the dielectric thickness on impedance layers (keep variation within ±10%), select prepreg by working backward from copper retention, and add PP layers or use high-resin grades like 1080 when needed.
Q5: How much does copper retention affect board thickness?
With the same materials, raising copper retention from 50% to 90% can shift board thickness by more than 0.1mm — it is the single biggest variable behind lamination loss.